TFE-Fluorocarbon Techlace™ Lacing Tape
A Long Trusted Wire Bundling Method
TechLace™ Lacing Tape
Lacing Tape lasts longer than cable ties. Cable ties turn brittle and degrade over time due to environmental exposure and loss of plasticizers. A roll of lacing tape can manage any size cable bundle, from a couple of 22AWG wires to a fistful of heavy power cables. Cable ties leave a sharp edge where the tail was cut off that can snag or get hung up. Some applications such as aerospace and aviation may specify laced harnesses as a design requirement. Lacing tape is ideal for lashing wires or cables to ladder bars, conduit and other wire management solutions.Unlike cable ties, the insulation on wires bundled with lacing tape has less chance of cold flowing and shorting. No sharp edges to cut installer's hands when reaching into a tightly packed wiring cavity. Lacing tape is available in a wide range of materials, sizes and finishes to accommodate any engineering requirement.
What Is Lacing Tape Used For?
The primary purpose of lacing tape is to secure and bundle cables, wires, or harnesses together. It provides a neater and more organized appearance than using alternative methods like zip ties or adhesive tapes. Lacing tape allows for easy access to individual wires or cables within a bundle, making it convenient for maintenance and repairs.
The process of lacing involves weaving the tape in a specific pattern to create a tight and secure bundle. This technique is commonly known as "lacing and tying." The lacing pattern can vary depending on the specific application, but it often involves creating loops and knots to hold the bundle together firmly. Lacing also helps to distribute the tension evenly along the length of the bundle, reducing stress on individual wires and minimizing the risk of damage.

What Are The Benefits of Using Lacing Tape?
Flexibility: Lacing tape is highly flexible, allowing it to conform to the shape of the wires or cables it is securing. This flexibility makes it suitable for use in tight spaces or areas with complex wiring arrangements.
Reusability: Unlike other fastening methods such as zip ties or adhesive tapes, lacing tape is reusable. It can be easily untied and re-laced whenever necessary, making it a cost-effective solution.
Enhanced Protection: Lacing tape offers better protection to wires and cables compared to alternatives like zip ties, which can create pressure points. The lacing pattern and the soft nature of the tape reduce the risk of abrasion or damage to the insulation of the wires.
Electrical Insulation: Some types of lacing tape, particularly those made of materials like cotton or polyester, possess insulating properties. This can provide an additional layer of electrical insulation in certain applications.
Tying a Single Knot With Lacing Tape
STEP 1:
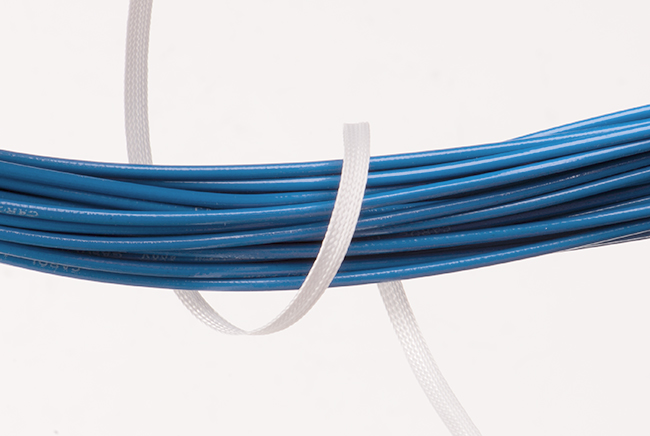
Wrap the lacing tape around the bundle so that both ends are on the same side and the loop is loose enough to work with.

STEP 2:
Slip the ends under the loose loop in opposite direction.
STEP 3:
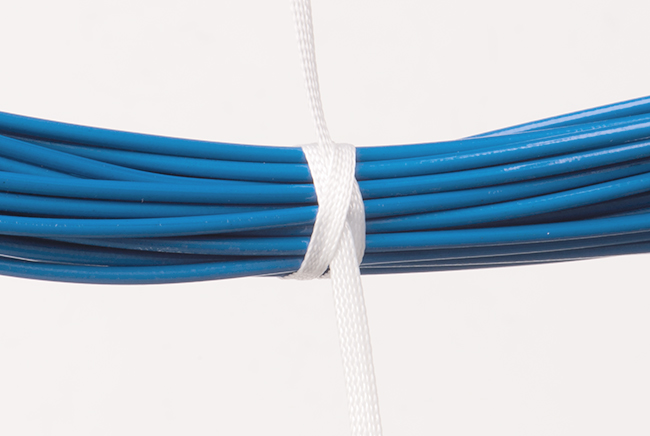
Snug up the knot, making sure that ends are captured under the loop. Tie off the two ends with a square knot and pull it tight.

STEP 4:
Trim the end, and you're done. Some people will put a drop of glue on the knots for extra security, but this is completely optional.
Tying a Marline Hitch With Lacing Tape

STEP 1:
Start the installation on one end with a locked clove hitch or other secure knot, leaving most of the length on one end of the knot, and just enough to finish the knot on the other.

STEP 2:
Snug the knot tight and trim the short end to about 1/8" or so. Keeping the lacing tape as flat and free of twists as possible, move down the wire bundle about 4 inches and form a simple lock stitch.

STEP 3:
Continue along the bundle, repeating the lockstitch at regular intervals.

STEP 4:
When you come to the end of the installation, take a couple of extra turns into the lock stitch, and tie the lacing tape off with a square knot. Trim the end, and you're done. Some people will put a drop of glue on the knots for extra security, but this is completely optional.
Rounded
FLEXO® Rounded is a premium process where FLEXO® products are rounded for improved aesthetics, spring, and installation time.

FLEXO® Rounded can retain its form for the lifetime of the product. It is commonly used in both retail and medical applications.
Notice: Longer lengths of product may lose some of its shape when applied to or shipped on a spool. Adding the Rounded option may increase the processing time of your order by up to 48 hours.